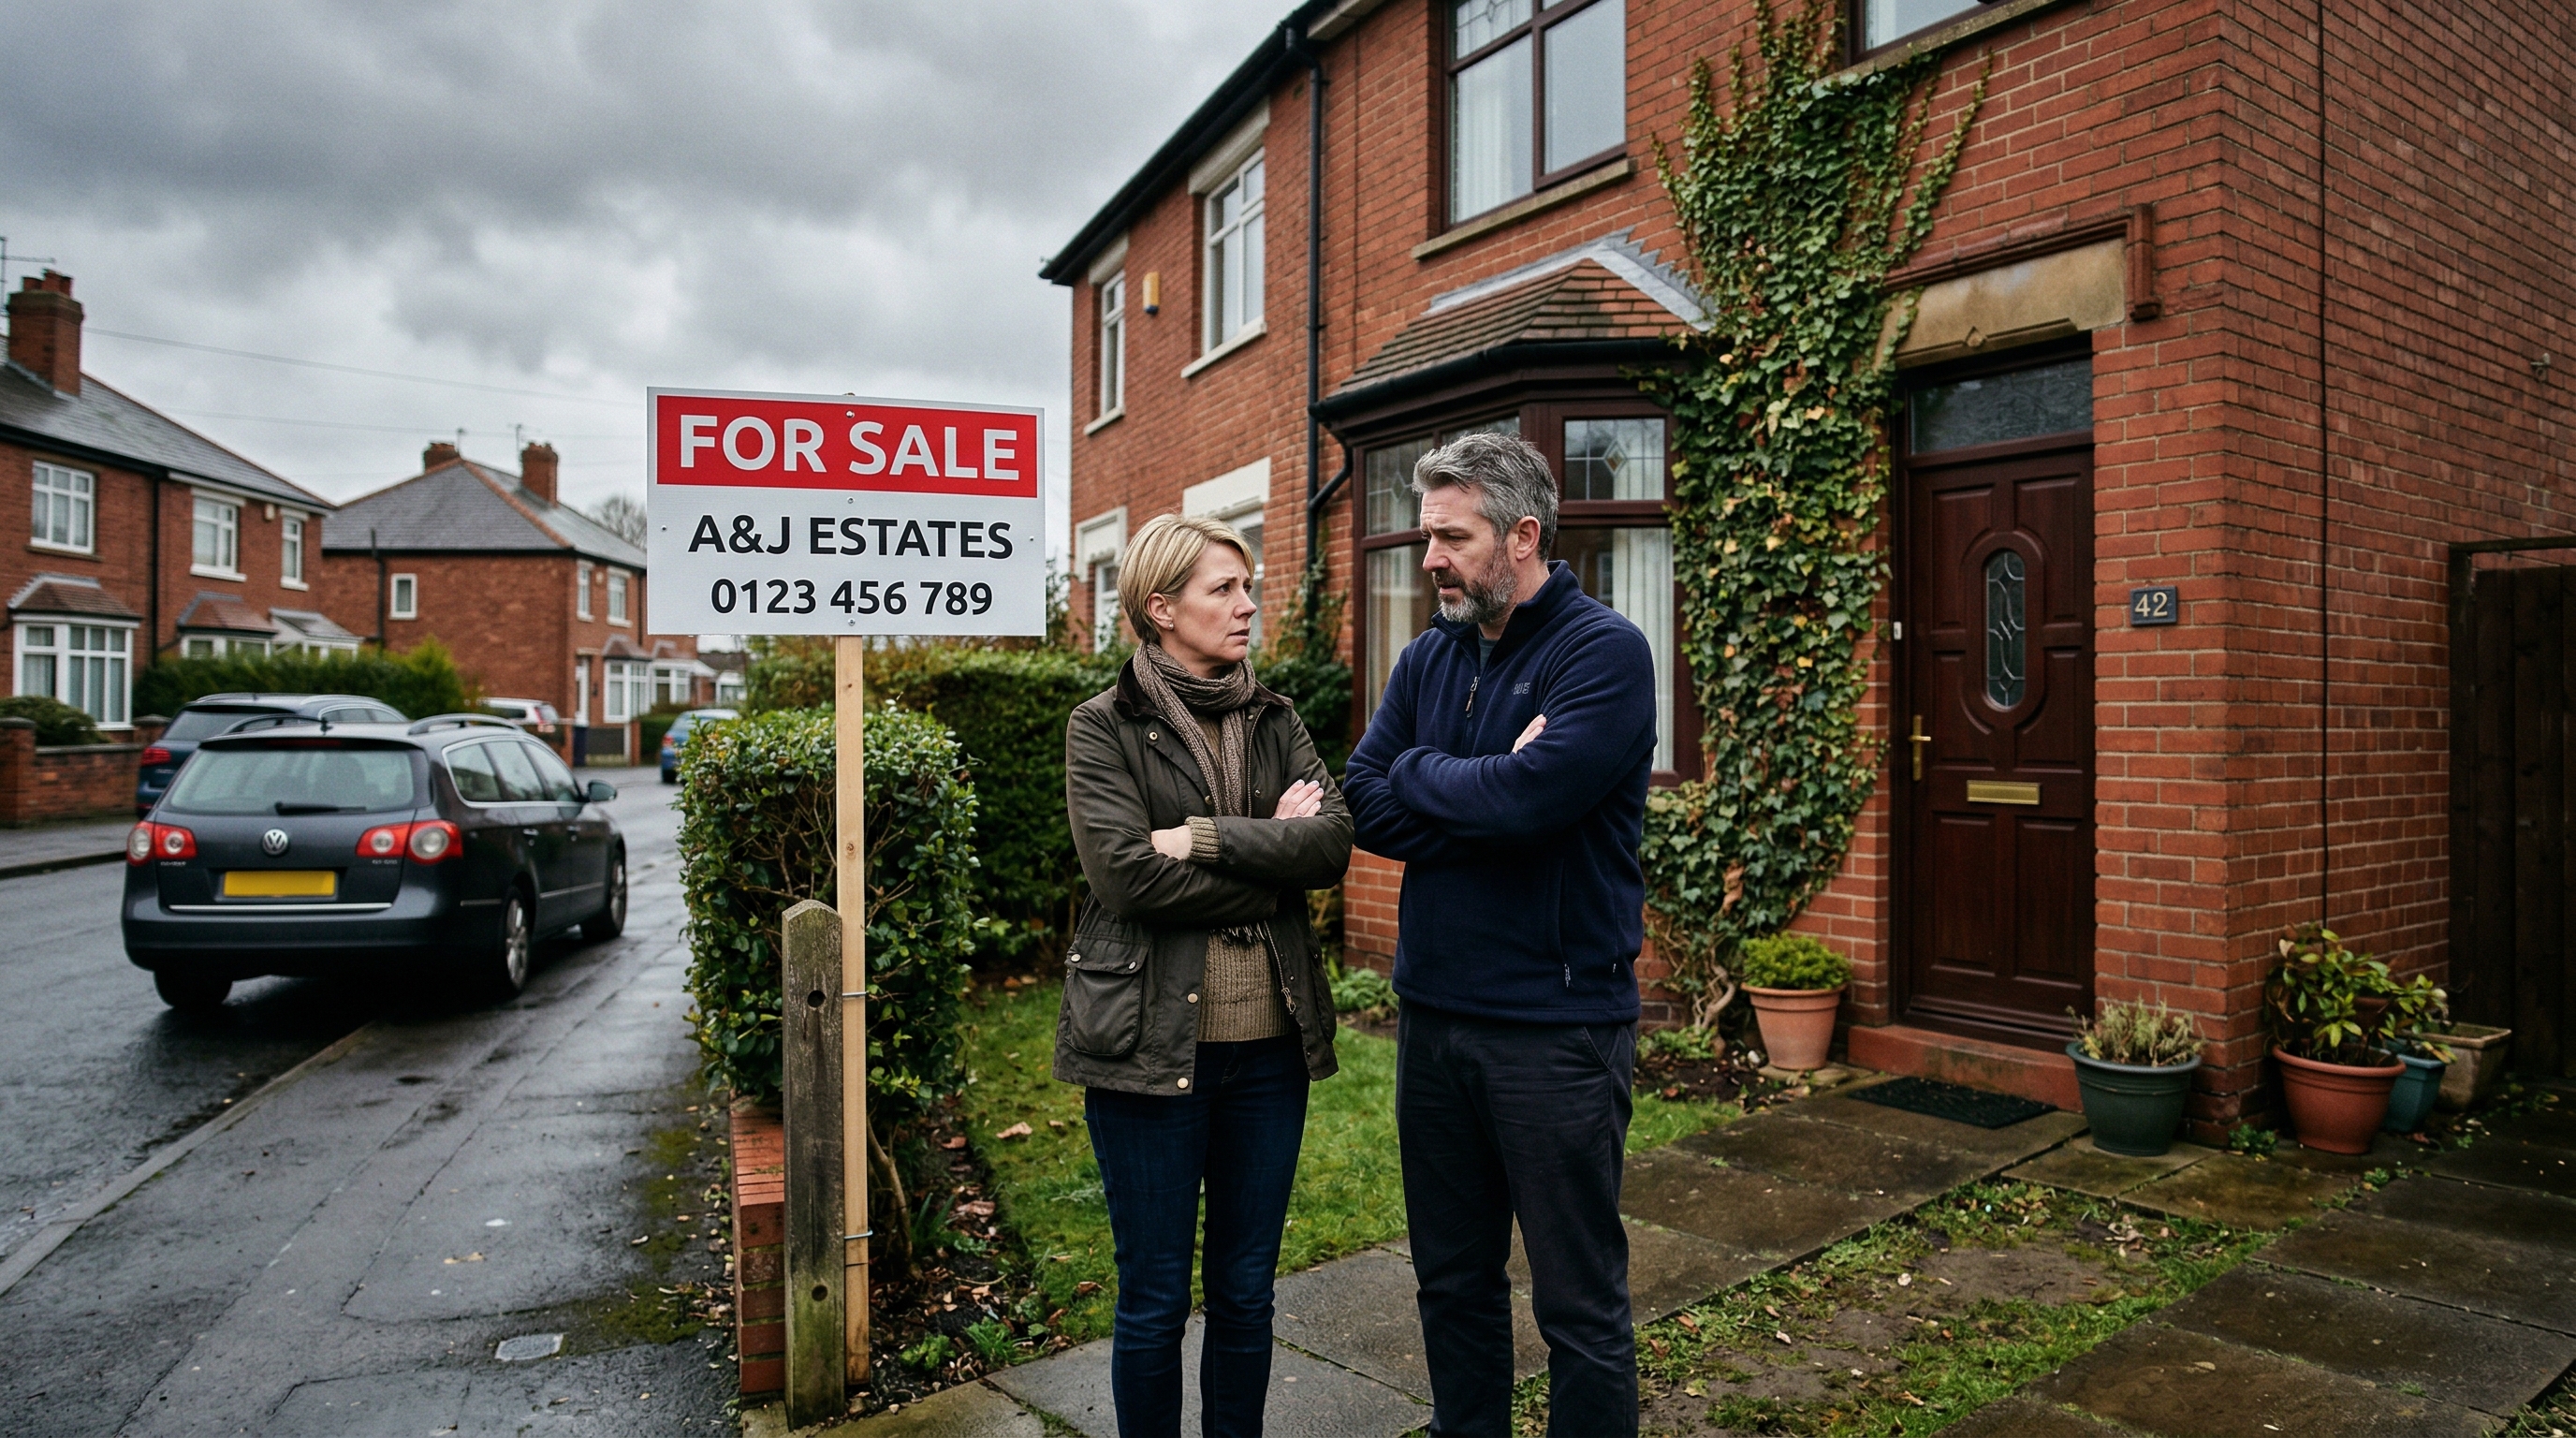
If you need to remove spray foam insulation from your roof — whether due to mortgage problems, roof damage, or because you're selling your property — understanding the professional removal process will help you make informed decisions and set the right expectations.
Step 1: Initial Survey and Assessment
Every professional removal begins with a thorough assessment of your loft space. The surveyor will check:
- Foam type — identifying whether you have open cell or closed cell spray foam (this significantly affects the removal approach and cost)
- Coverage area — measuring the total area of foam to be removed
- Foam thickness — noting how thickly the foam was applied
- Application method — whether foam was applied to tiles, between rafters, or both
- Access — loft hatch size, headroom, and any obstacles
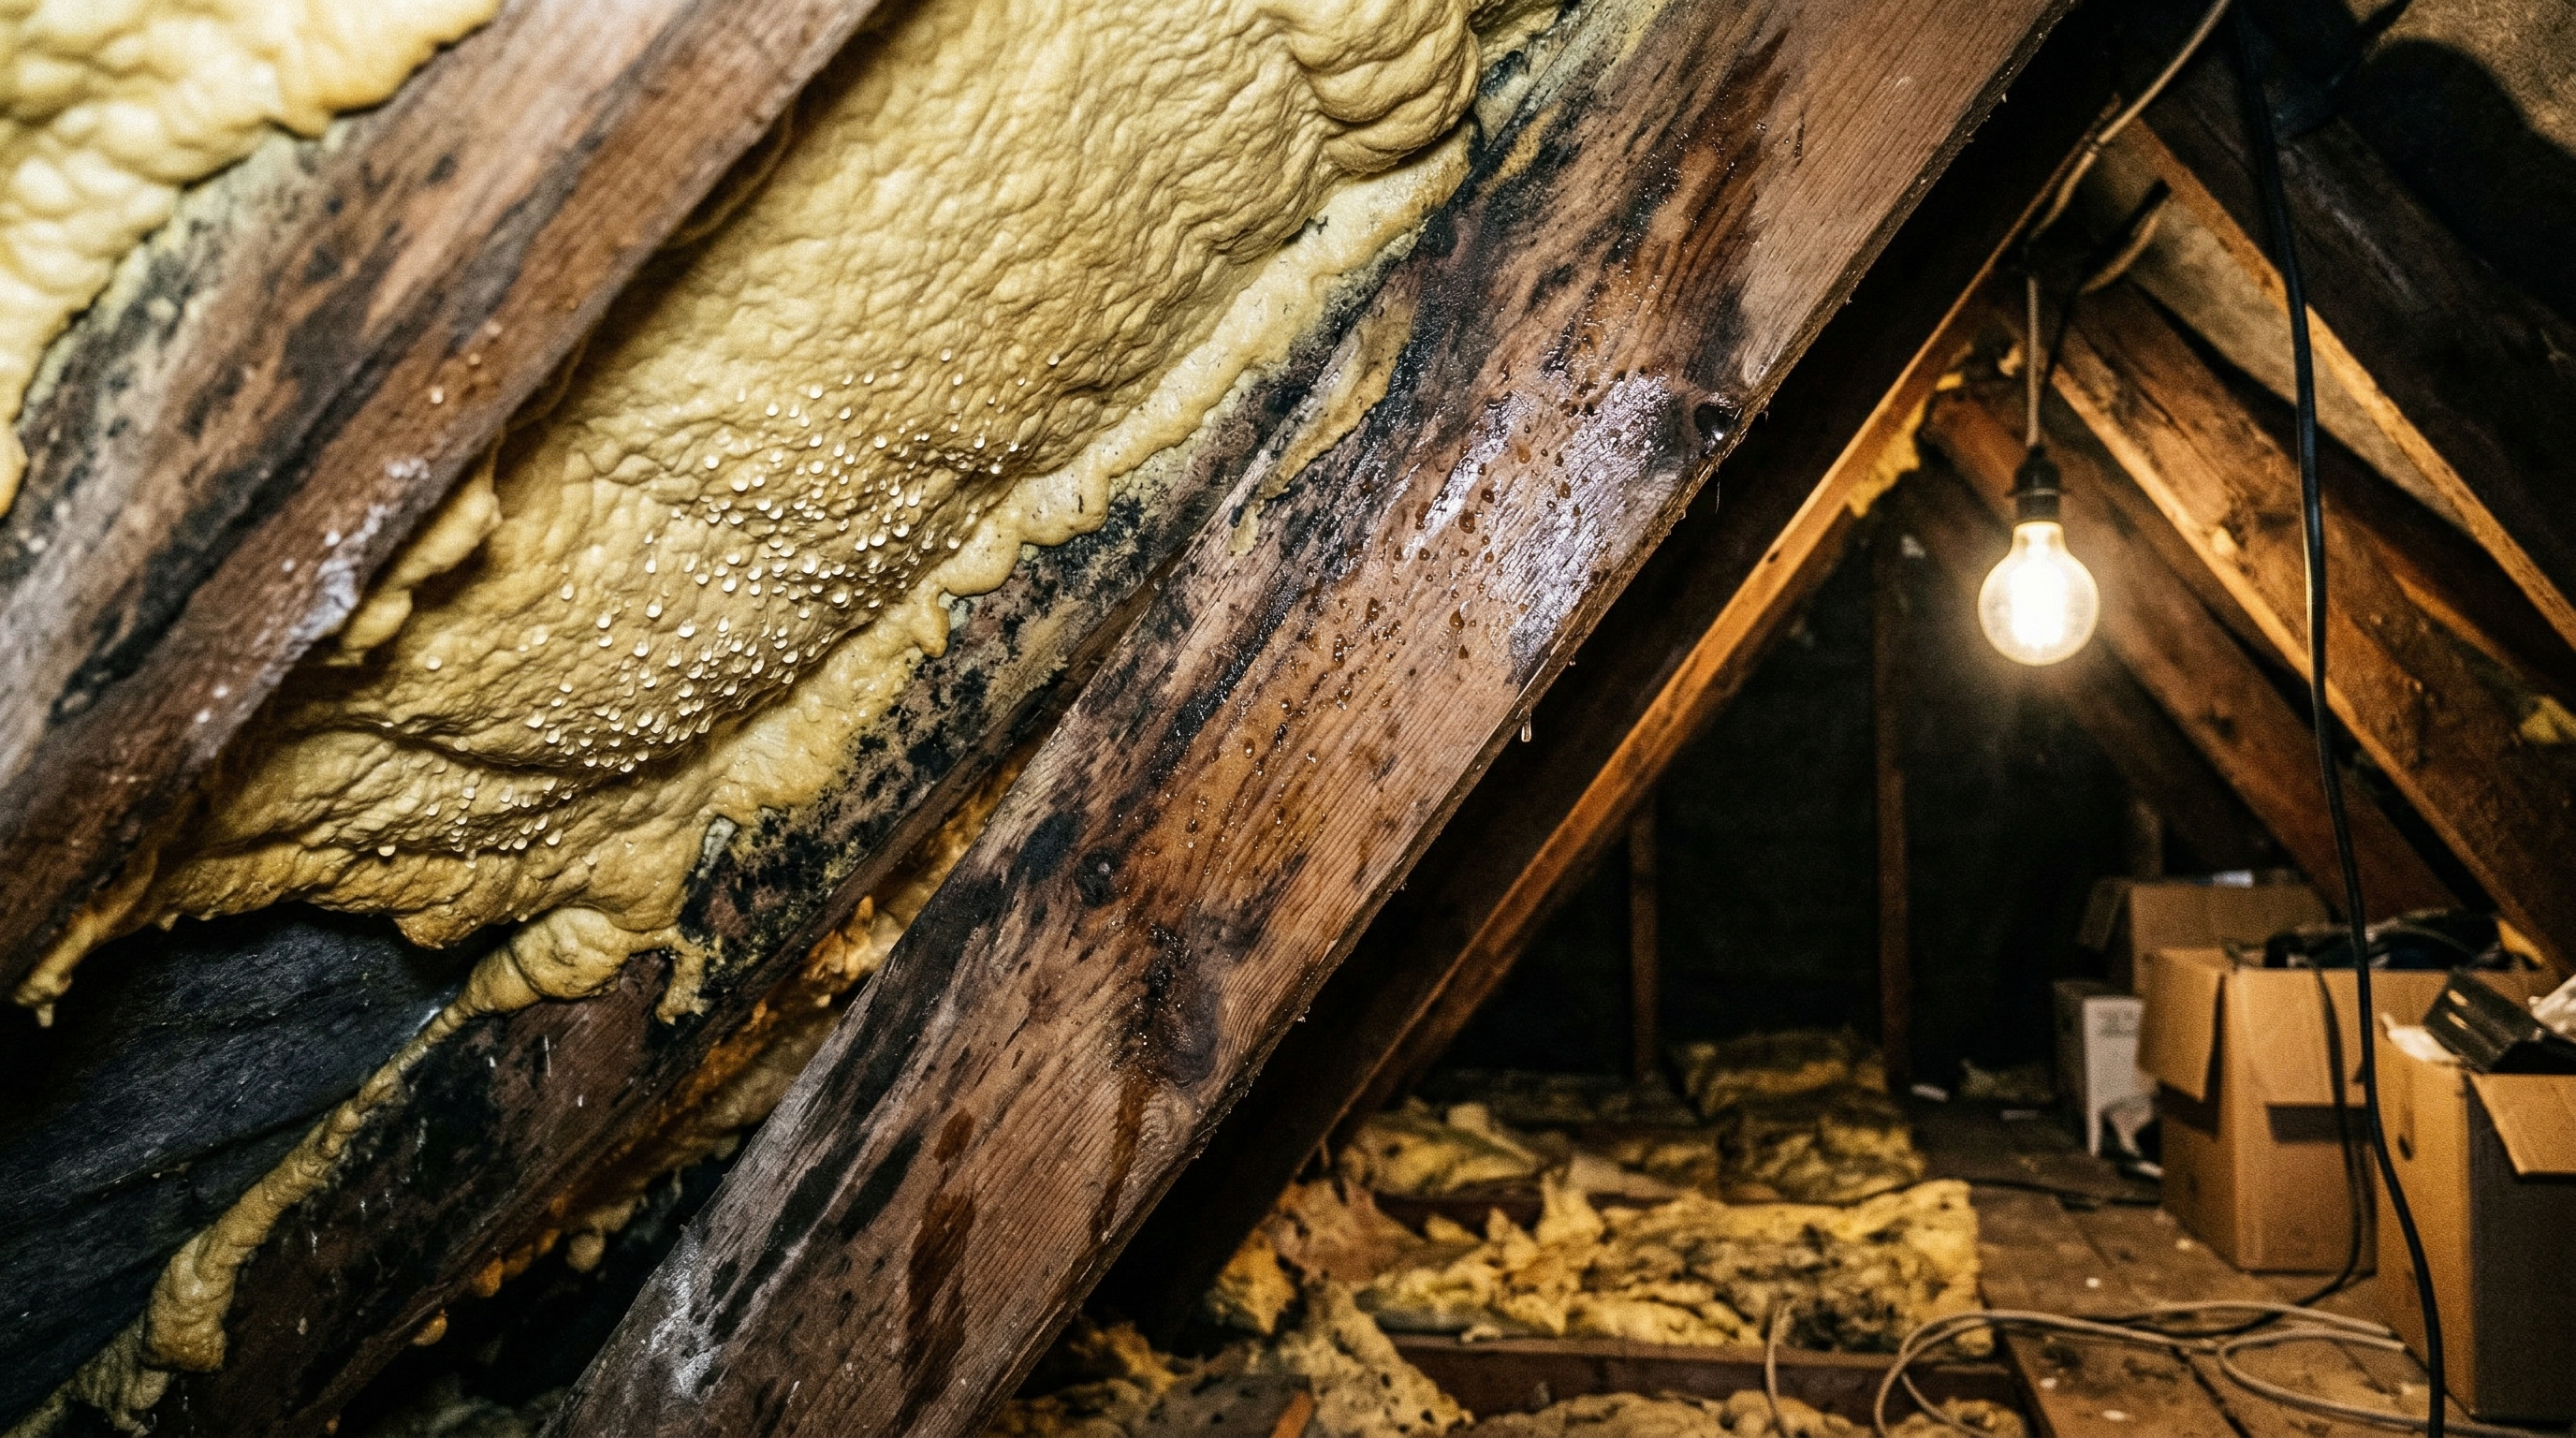
- Existing damage — any visible signs of timber rot or moisture damage
Based on this assessment, you'll receive a detailed quote covering the full scope of work.
Step 2: Preparation
Before removal begins, the team prepares the working environment:
- Protective sheeting is laid in the loft and around the access point
- Dust barriers are erected around the loft hatch to protect the rooms below
- Extraction equipment is set up to manage airborne particles
- All team members don appropriate PPE including respiratory protection and eye protection
- Working lights are positioned throughout the loft space
Step 3: The Removal Process
Open Cell Foam Removal
Open cell foam is removed using a combination of:
- Hand tools — scrapers and chisels to detach the softer foam from surfaces
- Peeling — sections of open cell foam can often be peeled away in sheets
- Vacuum extraction — foam debris is continuously vacuumed to maintain visibility and air quality
Closed Cell Foam Removal
Closed cell foam requires more intensive methods:
- Mechanical tools — specialist oscillating and rotary tools to cut through the rigid foam
- Controlled chipping — small sections are carefully chipped away to avoid tile damage
- Progressive clearing — working methodically across the roof in sections
- Constant monitoring — checking tile and timber condition as foam is removed
Step 4: Inspection and Repairs
Once all foam is removed, the exposed roof structure is thoroughly inspected:
- Timbers are checked for rot, decay, and structural integrity
- Tiles and battens are inspected for damage
- Any displaced or cracked tiles are replaced
- The breathable membrane (if present) is checked
- Ventilation pathways are confirmed as clear from eaves to ridge
If timber repairs are needed, these can usually be carried out at the same time.
Step 5: Clean-Up and Ventilation Restoration
After removal and inspection:
- All foam debris is collected and removed for proper disposal
- The loft space is thoroughly cleaned
- Ventilation is restored — eaves vents and ridge vents are confirmed clear
- Alternative insulation can be installed (typically mineral wool between and over joists)
Step 6: Certification
The final step is obtaining your post-removal certificate. This document confirms:
- All spray foam has been completely removed
- The roof structure has been inspected and is in satisfactory condition
- Photographic evidence of the completed work
- Details of any repairs carried out
This certificate is essential for mortgage purposes and adds value when selling your property.
Timeline and What to Expect
| Property Type | Typical Duration | Approximate Cost |
|---|---|---|
| Mid-terrace (2-bed) | 2-3 days | £2,500-£3,500 |
| Semi-detached (3-bed) | 3-4 days | £3,500-£5,000 |
| Detached (3-4 bed) | 4-5 days | £4,500-£6,500 |
| Large detached (5+ bed) | 5-6 days | £6,000-£8,000+ |
For a detailed cost breakdown, see our full pricing guide.
Ready to start? Request your free removal assessment today.